6c7c9fa62664dcfb5deba1c5fd69ad40
94d0e85ce7a9579abe5b9eeba581b916

We all know that ordering something online is often not as direct as picking a product and filing your credit information.
If you’re anything like us, you prefer to see what your options are — view every color from every possible angle and explore possible customization options.
We don’t see why ordering an online landscape design should be any different, especially if you’ll be spending lots of time in your backyard.
This post is dedicated to showing you all the steps involved in creating your own custom backyard, ranging from the plans themselves to actual information on how to install everything.
This is where you get to choose the bones of your design.
We offer three comprehensive plans that cover everything you could need in your outdoor space.
There’s the Grand Entrance, the Blissful Backyard, and the All-Inclusive Package.
These plans can be enhanced with custom add-ons that best suit you and your family.
Our team can integrate everything from lighting to edible gardens and even beautiful outdoor furniture.
Once you’re satisfied with your choices, we can move on to Step 2.
This is where it really gets fun because you are officially a client of Resort Backyard!
First, you’ll create a profile, then you’ll be checked in to your custom client portal where you can upload HOA documents and take our wishlist and style quizzes.
These quizzes are designed to help identify your taste, even if you have no idea what that is.
Your answers will let us discover your individual style and the best way to integrate your package and add-on choices.
And don’t worry.
We didn’t just pull the questions out of thin air either.
They were created by experienced & degreed landscape designers who have worked with hundreds of clients in the real world and know how to get to the root of your desires.
Step 2 is also where you help load our team with vital information about your property by taking measurements, photos and videos of your home so we can have a clear picture of what we’re working with. Our clear field instructions will make this process a breeze.
While we believe in teamwork at Resort Backyard, we also understand that it’s important to have one-on-one communication for best results.
That’s why we pair each client with a savvy and experienced designer.
You can communicate with your dedicated designer through your custom client portal.
Another great thing is that communication can be done on your own time and schedule.
That means you don’t have to take time off work to squeeze in meetings.
And you certainly don’t have to cancel your weekend plans because of an impromptu session.
You’re in charge.
In addition to all the information you’ve provided in step 2, you can also tell your designer other unique things about your backyard, share inspiration photos and anything else you’d like to add.
Are you inspired by a landscape design from your favorite resort?
Did you see a yard of interest that caught your eye?
Or does your neighbor have a unique lighting style that you want to copy?
Let your designer know!

Now we get to the exciting part.
This is where you get your custom design based on the parameters you’ve set.
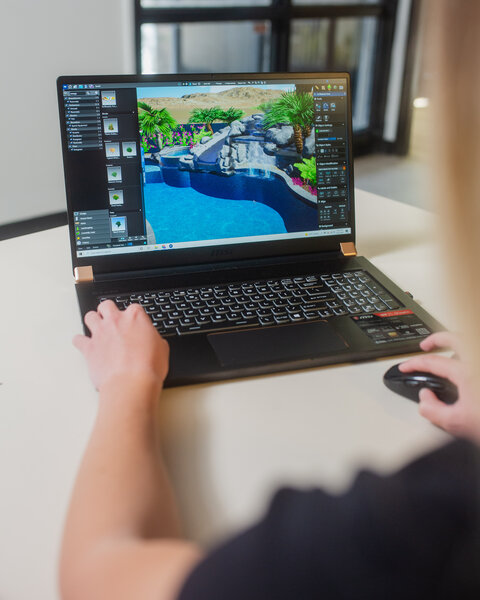
You’ll find a 3-dimensional video with photos of your design in your dedicated portal area.
But what happens if you don’t like a part of the design?
Well, not to worry because you can submit revisions as well.
Leave comments, corrections and suggestions for your designer on the designs so we can improve and give you exactly what you’re looking for.
We are very particular about this step in the process because it can mean the difference between your satisfaction and a disappointing backyard.
So, ensure everything is to your liking before moving forward. We would be heartbroken if you kept your thoughts to yourself!
And, thanks to the power of 3D video technology, you’ll be able to see everything in stunning animated detail, including how everything will look once you install the design.
Once your designer modifies the plans to accommodate your corrections, the only thing left is to receive your construction plans (and of course some killer swag).
We will mail you a box of deliverables that contain construction plans and a hard drive with all the digital copies of the plans.
This includes 2D plans rendered on AutoCAD, 3D plans rendered on Vip3D, and video graphics. We provide full size roll plans as well as digital files for your convenience.
All this may seem like overkill, but it’s not.
We’re trying to make it ridiculously easy for you to install your design, whether hiring a contractor or doing it yourself.
No matter what route you take, you will always be able to read the plans and act accordingly.
Remember the Resort Backyard goodies we mentioned earlier?
Well, one of them is a guide on how to vet and hire a contractor and a handy checklist for working with them.
In it, you’ll find what to look out for when hiring a contractor, which credentials you should ask for, which ones can be ignored and, most importantly, signs that you’ve found the right contractor.
But don’t worry.
If you’re planning to install it yourself, we’ll also send a manual with a step-by-step guide on what to do.
That way, you can nail everything on the first try and quickly start enjoying your lovely backyard.
Expect simple tips and tricks and important mistakes to avoid.
You’ll also get a detailed shopping list, so you know exactly what to buy to recreate the backyard you see in your plans.

Even though we’re not a part of step 7, it’s our favorite.
This is the part where you can enjoy the fruit of all your hard work and start vacationing at home.
And the best part is that you can run through the process from start to finish without ever disrupting your schedule.
If you’re ready to create a vacation getaway at home, click here to browse our list of packages.

94d0e85ce7a9579abe5b9eeba581b916
94d0e85ce7a9579abe5b9eeba581b916

Imagine it’s a calm, quiet afternoon and you’re looking to